Saturday, May 18, 2013

Firsts and Lasts: A Post About My Kiddos

Summer is around the corner, which means the end of spring. It means the beginning of some summer fun and the end of some activities.

Here are some firsts and lasts...

My girl got her first bicycle and her first scrape from falling off of it. It won't be the last.


The kids enjoyed their first ice cream cone of the season. It won't be the last either.


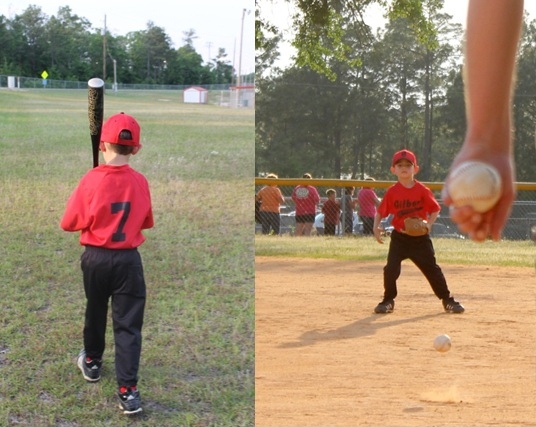
The last tee ball game of the spring season.


Hit, run, slide.


Love these two.

Love his face. Those big, ever wondering eyes. They just make me melt sometimes. Full of curiosity, excitement, and love. I do enjoy the way his face lights up when he has a new experience or learns something new on his own, sometimes with my help and I get the chance to see his mind work. It's really beautiful.
My silly, brown-eyed girl, wearing her cowgirl outfit (when it wasn't cold). She's looks cute and happy. She's pretty amazing. It's been fun to watch her go through life with a big brother. She asked him one day if he was a big brother. He was very serious with his answer, "I will always be your big brother. Forever and ever". *melt* I hope to continue to foster that kind of relationship between them.

I am looking forward to spending the summer with them. It will be my son's "first" summer vacation. At the end of it he will be a Kindergartner, and his school career will begin.

How the time has gone by so fast. And I am trying my best to remember that, even on the more difficult days. They are only mine for a little while.


Monday, May 13, 2013

Floor: Before and After

So, I've been painting a cement floor, in case you haven't noticed from the last 4 posts. Sorry about that, but I will be moving on to other topics soon, mainly the wall paneling and ceiling, because we haven't talked enough about that already.

Here is a before and after photo I put together...


I used Behr paint and the colors are-
    Topcoat: Pacific Gray (I think, I didn't bring home the booklet and I can't find it online.)
      Squares: Ultra Pure White
                   Diving Dolphin Gray
                   Gem Turquoise

I am smitten with this paint scheme and colors. I love it. It's so beautiful.


I think I am at least 98% complete now. No more touch-ups needed. I have to wait for the paint to cure before I seal it, and now that I put the paneling in the room, I have to wait to get that installed before I can move on to the next step anyway. So, until I get to that point I can just sit and stare at the floor, which isn't so bad because it's so pretty.

Sunday, May 12, 2013

95% Complete


This week I got all of the squares of my studio floor painted. Also, Lowe's delivered the paneling for my walls. It is almost complete. All that is left to do are some touch-ups to the floor and then seal it. I still have to finish the ceiling insulation and apply the paneling to the walls and ceiling, and then the room will be ready for moving in.
Here are some photos:
Paneling delivered...


Where I left off painting. The only squares left to paint were the blue ones.


Taking painter's tape off proved to be a bit of a challenge. Things didn't always turn out well. I'm not sure why that happened, but I am sure it was something I did or didn't do. Upon reviewing some instructions I had found online, but don't remember reviewing well enough when I looked at them again, I should have primed the floor with a second coat.
I had that same thought when I was pulling up tape, but since I had spilled most of it after the first coat I'm not sure how much coverage I would have gotten out of the leftovers.

I discovered that marking out the squares with paper templates allowed me to paint in the square, remove the paper fairly quickly, and didn't pull up the paint. So much faster and easier. Should have thought of that way earlier in the process. Towards the end of the painting process, I only had the blue squares left to paint so I went ahead and prepped all of the squares for painting the next day.

The completely painted floor. I have to admit that it looks as good as I was hoping it would.

You know those times when you think something is doable, and looks great in your mind, but in reality it did not turn out that way? That happens alot to me. This is not one of those times. The random grid pattern turned out the way I had hoped. It looks awesome in reality. Fantasy and reality match (besides the paint pulling up issue, only time will tell if this will actually be a nightmare for me). I am hoping once I get the floor sealed I will not have issues with bubbling or peeling or flaking.

We shall see.


Happy Mommy Day!!
(Even if you don't have kids, remember, Eve was a mother to all things before she had children.)

Monday, May 6, 2013

I'm painting

Short work week=time to work on my studio.

Woohoo!!!

I did some painting of the floor squares today. I'm liking how it is turning out so far.


Some things I learned today: Behr paint is really thick. Like Wendy's frosty thick. I was not expecting this. It gets good coverage, but when using paint brushes instead of a roller there are brush strokes that will probably be visible once it dries. The white will definitely need a second coat and I don't want to see brush strokes when I am finished.

The other thing I learned today, and it really didn't surprise me, is that it is difficult to paint, or do something like this, when the kids are home. Trying to make sure I know where they are and what they are doing while I am concentrating on the squares was not the easiest thing to do. They will both go to daycare tomorrow so I will not have to worry about them so much. It will be great.

I am liking how it is turning out so far. Looking forward to the completion. I am about 25% done, or 12.5% if second coats are required.

Tomorrow is going to be awesome! Except it is supposed to rain, again. Rain is a good thing, but it could be spaced out a little more. Hoping we will have a t-ball game as well.

Sunday, May 5, 2013

Taped Floor

I have completed the taping of the floor for painting.


Lighting looks good.


Better view of the lines.


Aerial view...sort of. Love the perspective though.


Are the lines absolutely, perfectly straight? No.
Can I live with it? Yes.
It may even add a little personality to the room. After all, nothing is life or nature is perfect.


The actual painting will take place on Monday. Hopefully. Since the kids will be home with me and will probably want to help.

Saturday, May 4, 2013

Taping the Floor

After finding out that cement floor paint only comes in one gallon units (disappointing), I decided to just try regular interior acrylic paint, which would be compatible with the topcoat layer. Once I put the sealer on, it will make it more durable for traffic. And then I can begin sewing and stuff again, because I bought some super cute fabric at Wal-mart and some of it was $1 per yard! and I want to make nice things again, well "nice" in my world. Well, I guess before I get to that point I need to finish the walls and ceiling.

I measured and drew lines on the floor to know where to put down the tape. Here is how far I have gotten. The squares will be 12 inches by 12 inches. I am eager to see the outcome.

Top photo: Looking into the space.


Bottom photo: Looking towards the door, almost done. I have two lines to do and then mark off those squares.


I put the tape on the wrong side of the squares I was going to be painting first, so I pulled it up to move it to the inside of the line....and some paint pulled up with the tape removal. That shouldn't be happening.

I primed the floor before applying the topcoat to ensure the paint would stick to the floor. The only explanation is that I did not use an etching solution on the floor before priming.

I was talking to one of my coworkers about this part of the project and she had done something like this and didn't use etching and it worked well for her.

When the time comes to pull the tape up I am going to go very slow and probably use a hair dryer.

Top photo: paint pulled up. *sad face*


Bottom photo: The three colors: a darker grey, gem turquoise, and white.


Come Monday when I start my short week of work I will begin the painting process. Can't wait to see the results. Happy results. Hopefully.