Friday, March 23, 2012

Pears and Apples Pillowcase Dress

This wonderfully cute fabric came from Joann's. I bought it back in November during my Black Friday shopping spree. The weather is perfect now for lightweight, adorable, girl dresses.


The measurements for this dress are: 11-12 inches for the top part, 16 inches for the bottom part, finished. The length is about 17 1/8 inches, including the casing or hem lines. Fabric was cut on the fold. For the diaper cover I used this pattern. Dana provides a great free pattern, printable from your computer as well as a tutorial. She is awesome! My girl will be two years old next month and is of average size. If your toddler is bigger, and/or taller, or you are making one for a smaller toddler/baby then make sure to adjust your measurements.

I didn't follow the traditional pillowcase style where you thread the ribbon through the casing for the ties at the shoulder. My girl likes to pull on the ribbons and sometimes they come out and if you are not prepared to thread it back through then you will have a partially dressed or completely undressed child on your hands. No one wants that, especially if you are in public and in a hurry.


Instead, I made the casing like you normally would, but I used elastic as a means of gathering the fabric for the front and back. Then, I sewed coordinating ribbon to the dress where I wanted them to be for a good fit. She can pull on the ribbons all she wants but she won't pull them out. Also, I just like the way the elastic makes the dress look. The ribbon will always be the same length on both sides as well. No more tying, untying and retying.

And there you have one adorable spring dress!


And adorable she is! Well, I think so at least.

She is starting to grow into toddler-hood. The baby days are pretty much over at this point. Next project, potty training.


What are you doing?                                                 Who me? Found my belly button.

Friday, March 9, 2012

Sold! The Harmon Tree Farm Experience

The kids and I went to the auction at the Harmon's Tree Farm in Gilbert. There was something I have had my eye for several months and I wanted to buy it. Luckily, it was going up for auction on my one day off this week. I took pictures.

There were a lot of cars there. So many that I had to park across the street, 5 lane highway, and schlep the kids safely across. People were parked at least 1/4 mile on both sides of the road, and finding any available space they could. There was one smart neighbor who decided to have a yard sale at the same time. Lots of potential customers for him. I think he did pretty well by the end of the day.

They started at the end of the farm and worked their way up to the front. They sold the animals first, then the farm equipment, old cars, playground equipment, then stuff in the blacksmith shop, and museum. I didn't expect to see so many people there on a weekday. Several people just came to watch. Brought their own chair and made a day of it.


How cool is this sign? I want it. I think it would go great in my sewing room. One day, as I do not have a sewing room to myself yet. My wonderful husband decided that I could share one of our outdoor sheds with him so that I could have a space all my own. It's temporary. I don't think he actually wants to have to share his space. We're going to add on to his shed and I will have a space all to myself, just for me, all mine. I can make a mess and spread out and not have to clean up so we can eat dinner. It'll be great...one day.


So, anyway, love this sign. Want it for my sewing room.


Here are the other signs on the wall that were also up for auction. Everything must go!


While I was looking around the inside of their museum I saw these metal painted chairs. They are cute and very detailed and in good condition. Would have also made a great addition to my sewing room. Compact seating.


This is the back of the green chair. Nice paintings on the back and front.


The boy showing me how strong he is. You go son! You are very strong! Now put that chair down so we don't mess it up.

The red chair. Also, nice. I don't know if they were going to be sold separately or together. Time was running out for us and we needed to get home to start dinner and relax and unwind.


 The red chair is painted on the front only. I apologize for some of the bad pictures. They were taken with my camera phone. When we went home for lunch I brought back the digital camera. Not the nice digital camera, but better than the phone camera. Getting the pictures off the phone was a whole other adventure.


I would love to have this Christmas Tree finial as well. But it wasn't one of the items up for auction that day.  It goes up for auction today, Friday, and I am not at home to go. Bummer. I looked around for a lot number or something to indicate how it was going to be sold. Together with some other stuff? Alone? Couldn't tell. I did find some pricing on it, $135. I am not sure if that was the original price of it when they owners first bought it, or if it is how much they were hoping to get for it, or if is was the starting price for the item. It remains a mystery. It sure is pretty.

While the kids and I had a good time at the auction, and it was fun to watch, I did not win my sewing machine sign. Bummer. I stopped bidding at $35. It sold for $45. Guess I will keep searching. Maybe I will find a sign at some of the antique stores in the area. The search will continue.

There was a photographer at the auction, as well, taking pictures for the Lexington Chronicle. We talked for a bit and he took a couple of pictures of my children. We made the front page of the website. Yea! Local celebrity fame, we were come! Please, please no autographs...the kids don't know how to write their names yet.

The kids' behavior was pretty good. I made sure to bring water and snacks for them. Food makes everything easier. It also helped that it was a pretty day and they could get out and play. They had fun on the playground before everything got sold and the crowd started moving that way. I didn't want them to get lost in the crowd.


I was able to take some good pics of the kids in front of the green building. I think the green makes a nice backdrop for photos. They look so cute.


The girl loved the pig yard ornaments. Had we stayed longer to see them go up for auction we may have bid on them and been able to make them our law ornament pets.

It was a great way to spend time with the children, enjoy the weather, and watch an actual auction take place. New experiences and all. It will be sad the see the Farm close permanently. It will be missed.

Friday, February 24, 2012

Simple Tote Bag

It's cute, easy, and functional!

1. Gather your material. Cut fabric to the sizes you need. Make some rectangles for pockets (optional).
Red and white fabric are cotton. The black and white print is vinyl with a fuzzy back. Canvas-type fabric for handles, and bias tape. Ready to start.

These are my measurements for this tutorial. You can make yours as small or as large as you would like. Make different sizes! Or styles! Endless options.

     Vinyl and white cotton fabric measures: 12 inches by 13 inches.
     Red fabric measures: 4.5 inches by 13 inches.
     Pocket pieces measure: Varies depending on what you are putting in them, like your phone or keys so measure those items and see how big you would want to make them.
     

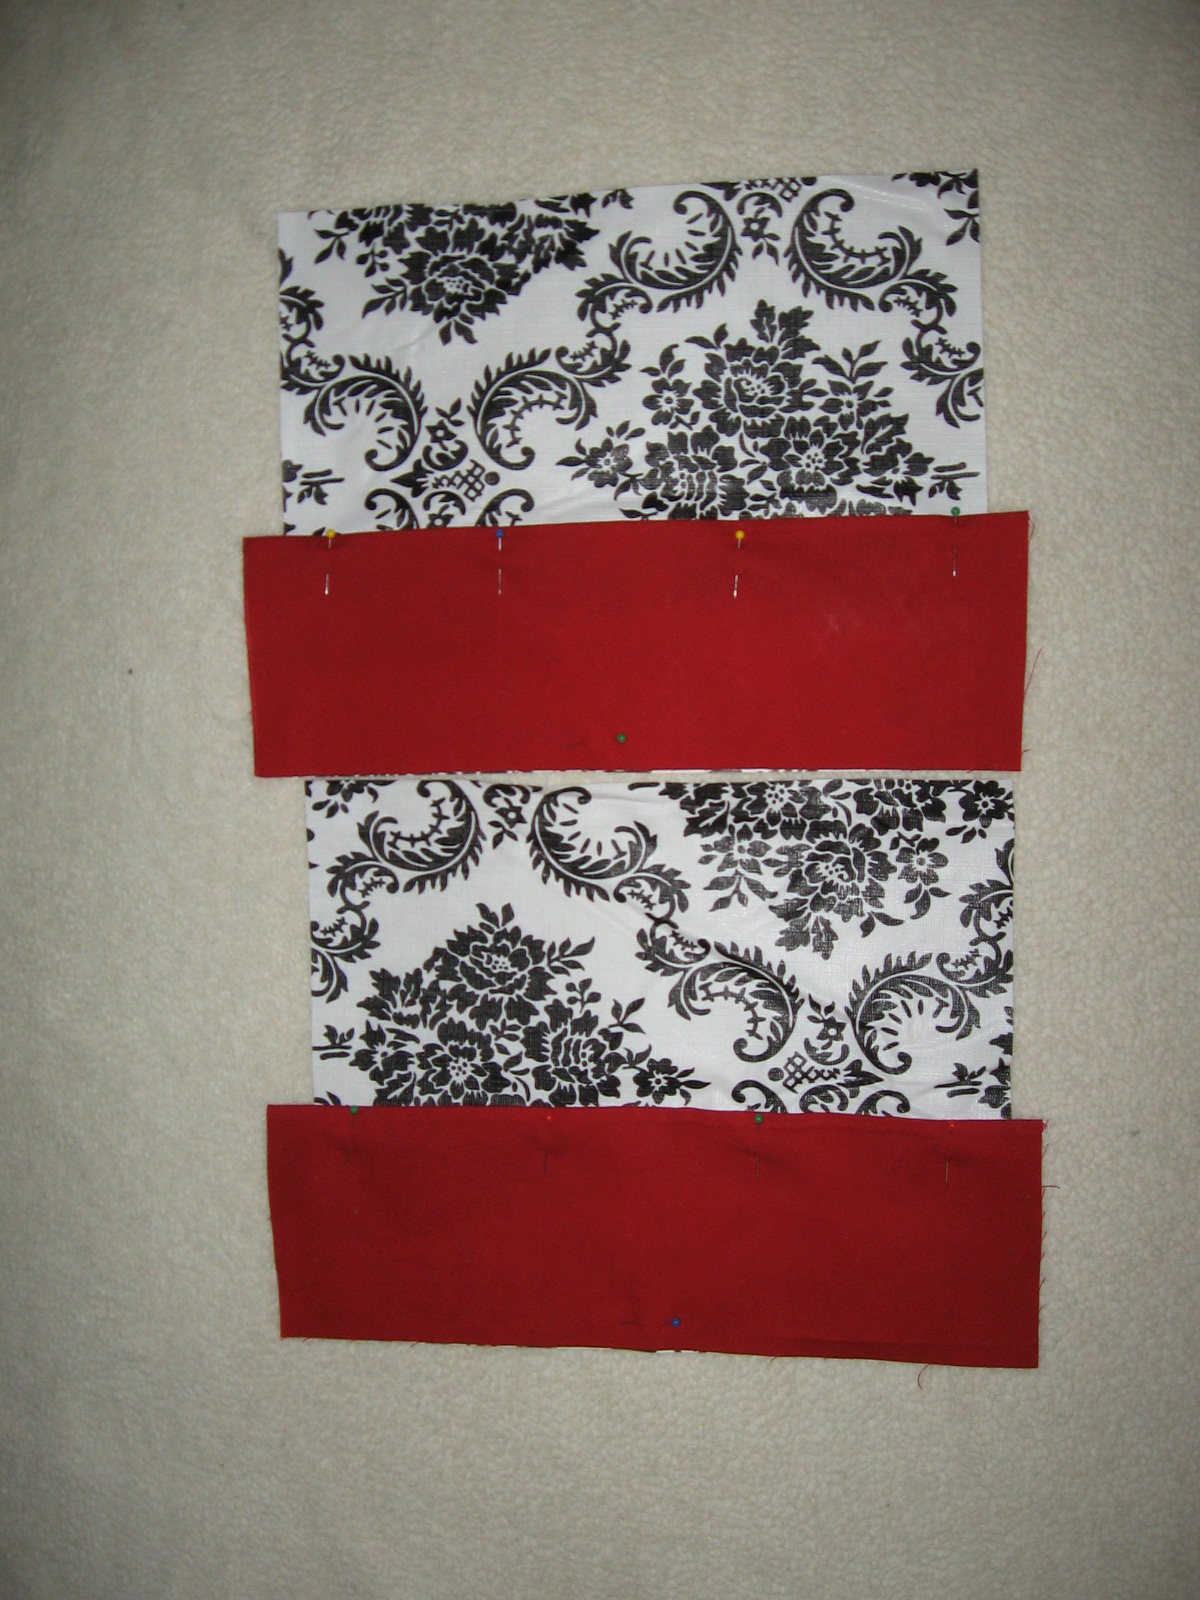
2. Serge on one long side of the red fabric. Then iron it over so that it can not be seen. It provides me with a straight line to sew to the vinyl. You can just iron it over a 1/4 inch if you do not want to serge or do not have a serger. Pin the red fabric on top of the vinyl matching the sides and bottom of both pieces. Hopefully they are straight from cutting earlier. Sew the red fabric to the vinyl. I sewed a 1/4 inch down from the red fabric to catch my serge line for attaching.


3. Sew pockets pieces to white lining fabric. Attach pocket pieces about 3 inches from the top. The smaller pocket on the bottom is further down and when the project was completed it was almost on the bottom of the bag. But it still works.

4. Stack all four pieces (outer and inner pieces) together and cut notches on the left and right bottom corners. Cut them at about 1.5 inch square.


5. Sew the white lining, right sides together, on both sides and at the bottom. Then, sew the corner pieces matching the opposite corners together to complete the bag. Match the outside corners together to make a straight line by pulling the panels apart at the inside corner until the outside corners touch. Sew a 1/4 inch hem to make it look more like a bag. Do the same thing to the outer fabric (the vinyl pieces).


6. Create handles from matching or contrasting fabric, or leftover scrap fabric, or ribbon or whatever you wish. I used black canvas-like cotton fabric. It measured approximately 6 inches wide by 15 inches long, or however long you would like, to start with. Make as long or as short as you like. I ironed the fabric in half and the folded the fabric to the middle (fourths) and ironed it again. Then, folded the fabric at the middle so that it would make sturdy handles. I sewed the handles using a 1/8 inch stitch on the right and left sides. I stuffed the white lining inside the outer shell, wrong sides together, matching the corners and side seams. I added bias tape around the top of the bag to finish it off.

Complete!

Here, I added the handles to the inside of the bias tape (then sewed the bottom bias tape) and folded the handles over the top of it so it would have a clean edge underneath; so when I sewed the bias tape around the top it also sewed the handles to the bag. Just trying to save a step.


Be sure to match up your seams so that you don't have this when you are done with it. Maybe add some ribbon or rick rack around the seam to hide mistakes?


Cute!

Without monogram and with monogram.
Enjoy!

Friday, January 27, 2012

Valentine's Day Pillowcase Dress and Tutorial

Tri-Color Pillowcase Dress for Your Little Valentine


A simple and precious dress for a lovely day!
Want to see how it was done?

1. Gather your material. I used three colors of fabric: white, pink and red for a more festive feel. I used cotton, broadcloth and whatever I had in my stash, or had gotten from the remnant bins at the fabric store so I don't always know what kind of fabric I am using. I did make sure they were similar in texture.


2. Measure your child or grab a shirt from their closet.
    Measurements for this particular dress were:
           White fabric: 10.25 inches (top) by 12 inches (bottom): 5.5 inches long
           Pink fabric: 13.25 inches (top) by 14.75 inches (bottom): 4 inches long
           Red fabric: 15.5 inches (top) by 17.25 (bottom): 4.5 inches long
  
This would probably fit a baby that is between 6 months and 12 months old. My almost 21 month old was slightly too big for it and she is on the smaller side, but it would fit a smaller baby just right. And it was too short for her. An error on my part.

3. Cut fabric. Two pieces of each color for front and back panels. (For the white fabric I cut four pieces, two for each side, to make it a little less see-through).


*Tip: When cutting your angle make sure the straight sides line up and are not stagerred like mine are in the picture on the left. Make sure you start your cut on the white fabric at the top at the length you want the top to be or slightly bigger based on your measurements and additions. Make sure your angle cut is slanted enough so that the other fabrics will be cut big enough for your child to fit into it at the chest, waist, and hips.

4. Serge fabric. (You can do this after sewing, but I like to do it first to give me a good line to follow when sewing the seams. It helps me, I think. If you don't have a serger you can use your zig zag stitch and sew along the edges or your fabric to keep them from fraying over time. If you sewing machine has an overlock stitch, that will work, too).


5. Sew the side seams of each white panel using a 1/4" seam allowance. (This will not be sewn to the back panel to allow room for arms and for added roominess). Then, pin and sew panels together.


6. Iron seams down. Very important to always iron your seams.


7. Match front and back pieces, right sides together starting/stopping at the white fabric, and sew the side seams. Iron seams.


8. Trim dog ears on red fabric. (Dog ears-the little triangle thingies that sometimes stick out at the bottom of fabrics).


9. Iron a hem and then sew it in place.


I did a 1/4 inch hem and then an 1/8 inch hem for the added sturdiness and because I like the way it looks. I used the regular white thread I used throughout the project to give it some contrast, but you can use matching thread if you want the hem line to be hidden.

10. Make casing for the top. The casing can be as big as you need it to be depending on the size of the ribbon you plan on using. Mine was about 1 inch with a finished size of  3/4" after sewing it in place. If you want to use bigger ribbon just add on the extra amount when cutting the fabric at the beginning of the project.


11. String ribbon. (The ribbon is a little long in the picture because I didn't want to cut this particular ribbon until I was sure it was the one I wanted to use).


 The end.

You can admire your work.

Try it on your child.

Or start over as I did because the first two I made didn't work out the way I wanted. Third times a charm right? Hopefully it will be big enough for her and not too long or too short. Either way they still turned out ok. Definitely need to improve my sewing skills with this one, but that is what it is for. It's all about learning and trying and doing, and sometimes even redoing.

This is the first one I made. It was too small in the chest area and too long; so for the second one I made it bigger and shorter. (The one in the tutorial). It ended up being still a little too small in the chest area and shorter than I wanted it. The third one should turn out just right.
Maybe.
Hopefully.

..............................To be continued...........................................................


This is the first one I made. I reconfigured it to make it shorter. The proportions look a little better. Don't look too closely though, there are plenty of mistakes, but it is still cute.

..................................To be continued, continued.............................................

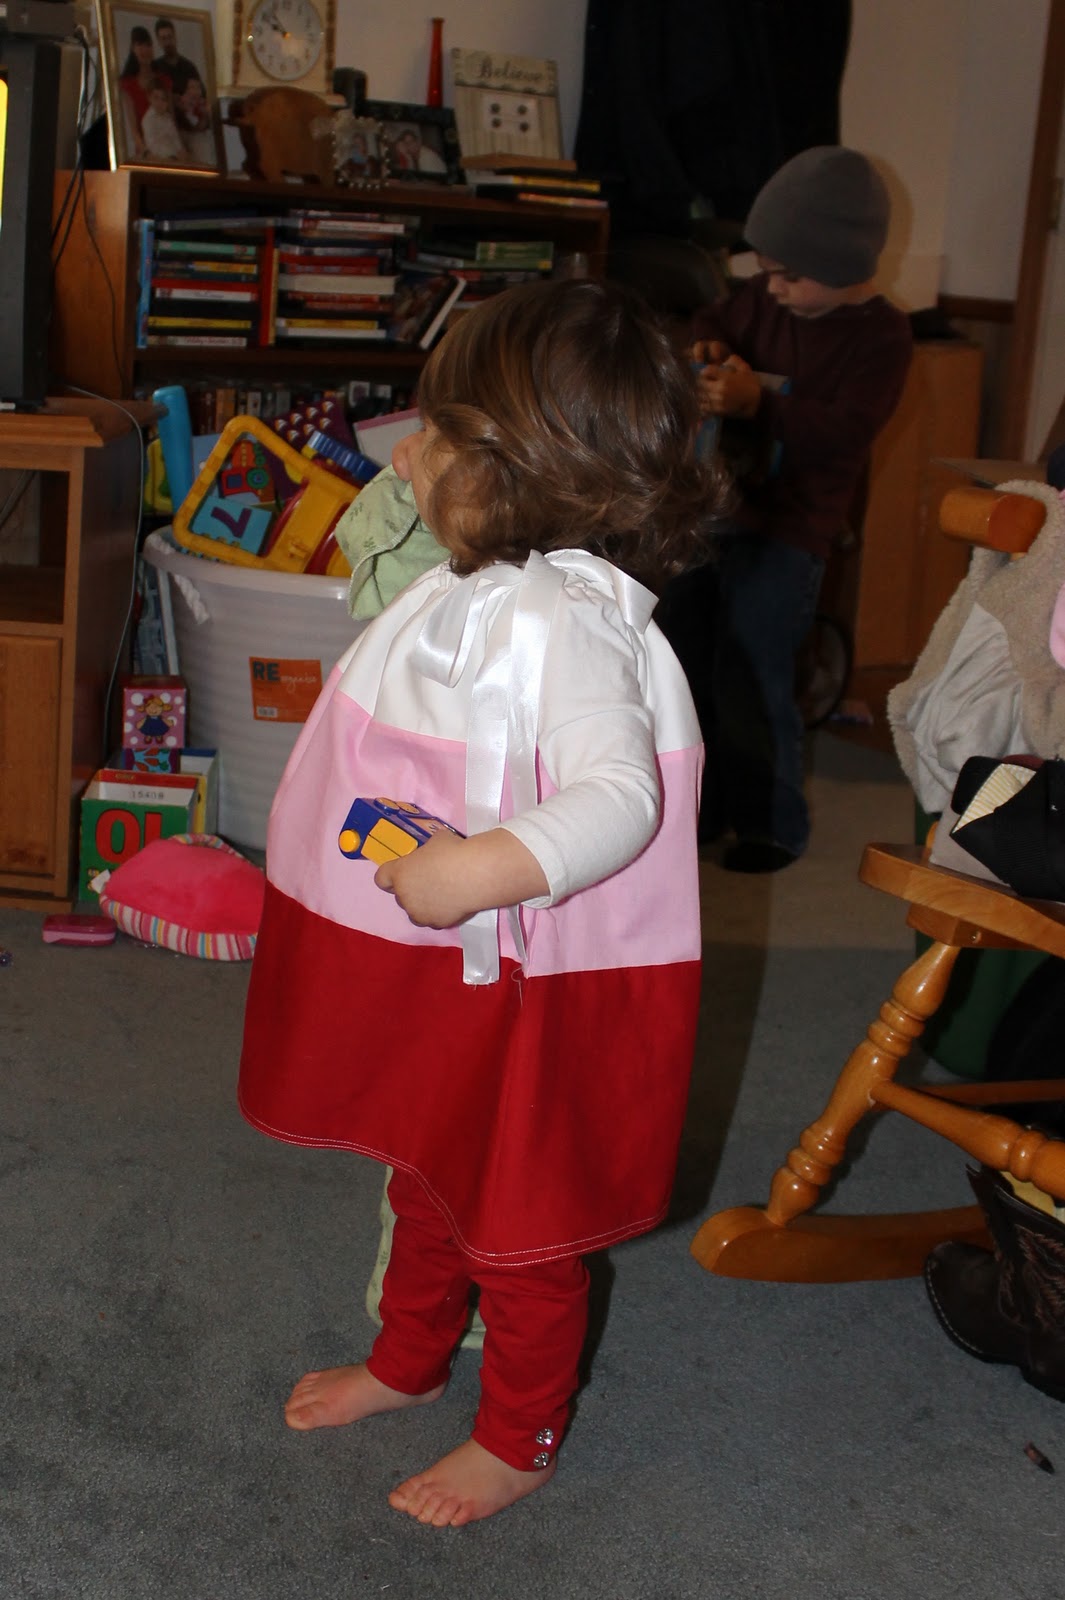
Well, it seems that the third time really is the charm! The third try in this project finally yielded a result I could be happy with.


Then, I put it on the girl. She wasn't happy about it in the beginning. Apparently trying on pillowcase dresses is a traumatic experience, but with the promise of a sucker afterwards she relented and let me take a couple of pictures. They are not the best photos, but I was not going to push it.


Finally, a pillowcase dress that is not too small or too short. It turned out to be a good length and it fits he upper torso much better than the previous two. It is kind of billowy. Better billowy than too small though.
I found those adorable leggings at Wal-Mart. Even though they were with the Valentine's day clothing they are really Christmas leggings and all christmas stuff was half off of the sale price. Leggings total = $1.25. Yes!

There you go. A Valentine's Day Pillowcase Dress for that special little girl in your life.
Happy Sewing!

-Jackie